Pages

Wednesday, December 23, 2009

The Daring Bakers December 2009 Challenge: Gingerbread Houses

The December 2009 Daring Bakers’ challenge was brought to you by Anna of Very Small Anna and Y of Lemonpi. They chose to challenge Daring Bakers’ everywhere to bake and assemble a gingerbread house from scratch. They chose recipes from Good Housekeeping and from The Great Scandinavian Baking Book as the challenge recipes.


I really should have opted out of this month's challenge. Gingerbread houses?? More arts and crafts than baking. December has been such a busy month, between changing jobs and preparing for the holiday party in Salem... the last thing I needed to do was spend hours slaving away over an edible house. So what did I do? I decided to invite my friends over for a Gingerbread House party... because when you don't have time to make one house, you should make three or four. What a mess. The party itself was fun, but this challenge was so labor intensive that I am going to have to opt out of future decorating-focused challenges. Much to my embarrassment, this challenge kicked my butt.


For the gingerbread, I opted to use the recipe from Good Housekeeping. I had all of the ingredients on hand, and the lack of butter and eggs made it feel like a cheaper option. I doubled the recipe and had enough dough to make four houses and some accessories. I was too tired to make the accessories or the fourth house - but if I had wanted to, there would have been enough dough.

The gingerbread dough was pretty stiff and difficult to roll out right when it was pulled out of the fridge. I had better results (and my wrists were much happier) with the chilled dough that had sat out of the fridge long enough to return to room temperature. A number of daring bakers complained that shrinkage during baking was a problem. Once I had rolled out my dough, I chilled it in the fridge for 30 minutes before baking and did not really have any problems with shrinking. Problems with the dough itself? That is a whole other story.

I don't know if it was an error in the Good Housekeeping recipe or the weight conversions that our hostess used when reprinting the recipe, but my dough was a mess. A crumbly, dry mess. It took about a half cup of water and several tablespoons of cream to get it moist enough for rolling... and at that point the dough had been kneading so much that it was nearly unworkable. At about 2am the night before the gingerbread party, I had to call it quits... sweaty and tired with wrist cramps... I just could not roll out any more cookies.


Instead of making my own template, I borrowed a basic one from Martha Stewart. I chose the template because it had a pattern for a chimney, which set it apart from other patterns I found on the internet. After two days of rolling out and baking gingerbread, I decided not to make the chimney. So much for the cute pattern.


In terms of mortar or cement, I stuck with royal icing and passed on the simple syrup glue. For royal icing, I used a basic recipe - 3 egg whites beaten to a medium meringue. 1 1/2 pounds of powdered sugar were gradually mixed into the meringue and beaten until the mixture was stiff and fluffy, stiff being the operative word. When I first started to think about how I would attack this challenge, I had visions of beautifully decorated homes dancing around in my mind - homes with perfectly piped icing, precisely placed candies, and possibly even some fancy marzipan or fondant modeling. Yeah. Right. The icing was a mess. Thick... heavy... and not pipe-able. It squeezed slowly out of the tip in thick globs that were so messy that after a few tries, I resorted to slopping it on the house with my fingers.

On top of all of that, our gingerbread houses also had structural issues. Somehow I put them together incorrectly which meant that the roofs were too small. We had to resort to an elaborate support system (using chewed gum as cement) to get the roofs to stay up. Ugh.

And voila - our gingerbread village. I wish I could say that a small child decorated mine, but alas, it is my own clumsy icing work. I can ice a cupcake with my eyes closed, but gingerbread houses are just not for me.


My recap of operation gingerbread makes it sound like I slacked off on this challenge. The sad thing is, that could not be further from the truth. I WISH I had slacked off. Instead, I spent WAY too much time on this with little to show for it. I told A that if our unborn children wish to build holiday gingerbread houses, they will have to visit a friend. This is the first, and last time that I would be doing anything like this.

Here's to hoping that the January challenge is more up my alley.

Sunday, December 20, 2009

Pear & Hazelnut Tart, Citrus Macarons


I noticed that a number of people are stumbling across my little blog because it is coming up in google search results for "macarons" and "air-pockets"... I am assuming from people who are struggling to solve the problem of air-pockets in their home baked macarons. Since google seems to think that my blog should provide that information, I decided I should probably share some of what I have learned on this subject over the past few months of trouble-shooting recipes.


It took about 3 or 4 months of experimenting for me to find a reliable recipe. As mentioned in a previous post, I started working with a "french" method recipe, but ultimately settled on the Italian method, which seems more complicated at first glance but is actually much more forgiving. See this post for more information on the difference between the french and italian methods. Syrup and Tang also has an excellent explanation of the two.

With the french method, I never solved the air-pocket problem. I tried every oven temperature variation... I tried baking with two sheets to insulate the shells... I tried over mixing and under mixing... each time my shells looked beautiful but the texture was completely off. The exterior shell would crunch when bitten, revealing a large interior air pocket between the softer "cake". A combination of patience and Pierre Herme's italian method helped me fix this problem.

I noticed that even with the italian method, the air pocket problem still exists if you try to eat the shells fresh out of the oven. The air pocket also remains if you try to eat the shells immediately after filling them. Interestingly, if you fill the shells and then refrigerate them for about 24 hours, the air pocket disappears and the macarons have the delicate texture of those you find in a professional bakery. I think it has something to do with the shells absorbing some of the moisture from the filling - it softens the interior and just helps the whole thing come together. Moral of the story - macarons can't be rushed!

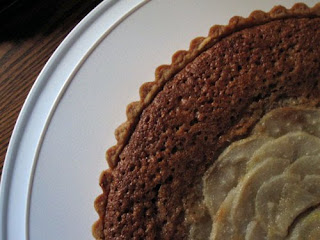
Moving on to this week's baking... as the Christmas party in Salem rapidly approaches, I find myself trying to squeeze in a few last test runs to make sure that everything comes out alright. We had a dinner party on Friday night, and as usual, I volunteered to bring dessert. I had a ton of leftover hazelnuts, so I thought I would give the pear frangipane tarts another go. The first time I experimented with this recipe, I did a straight walnut frangipane. It was okay... A loved it... but I did not think that the walnuts were flavorful enough when paired with the poached pears. Hazelnuts did the trick, giving the tart a more interesting flavor. Whipped cream or vanilla ice cream adds a nice touch. A miniature version will be added to the Christmas menu.


And of course some macarons to accompany the coffee. Now that I can make them, I will gladly jump on any excuse to whip up a batch. Leftover meyer lemon curd meant citrus macarons were on the menu.
Recipes after the jump!

Wednesday, December 16, 2009

Sunday, December 6, 2009

I am a macaron master: Hazelnut, white chocolate and coffee macarons


I have finally mastered the macaron. Okay, so maybe I haven't exactly mastered it, but I am close enough that I can pretty much make a batch of decent cookies on demand, whenever I want. Music to A's ears... my phone call on Friday afternoon announcing that I would no longer need to make macarons every weekend. I had finally found the right recipe and honed my technique to the point that I can produce reliable macaron shells at any time. Other home bakers out there who have tried to make macarons will understand just what a triumph my success was. (This funny write-up describes the macaron obsession accurately.)

A few weeks ago, my Pierre Herme macaron cookbook arrived from France. After a few days studying and translating the recipes, I had decided that it was time to pull out the mixer and start separating some eggs. At first, I found his recipe a little intimidating due to its call for the use of a thermometer. All of my past attempts at macarons had involved the French method, while Herme recommends using the Italian method. The difference is that the French method involves whipping egg whites and sugar into a stiff meringue and then incorporating the dry ingredients. With the Italian method, it is necessary to prepare a hot sugar syrup that is then poured into the meringue to produce a stiff Italian meringue that almost has the texture of marshmallow.

The Italian method involves a few extra steps, but it yields much more reliable results. Perfectly smooth shells with fluffy feet and, most importantly, no air-pocket inside. Another bonus - overmixing is not as much of a problem as it is with the French method. In fact, in my trial and error, I found myself undermixing more often than overmixing. If the batter looks lumpy, keep mixing. If you see beaks forming on the tops of your shells as you pipe them out and those beaks refuse to sink into the shell after a few seconds, keep mixing.


You might ask after seeing the photos... why do they have a funny blueish-green tint? Honestly, I was so convinced that I would fail yet again, that I thought this would be a good time to play with food coloring. I added some blue dye just to see what would happen. Of course this would be the time that the batter cooperates, leaving me with beautiful, but oddly tinted cookies.

A little hazelnut garnish on top gives these a little something extra.


Here is the recipe I used, adapted from Macaron, by Pierre Herme:

Macaron Shells
yield: approximately 36 sandwiches or gerbet

60 grams hazelnuts
110 grams egg white, aged
300 grams powdered sugar
150 grams almond meal
37 grams water

Preheat the oven to 360 degrees. Spread the hazelnuts on a baking sheet. Toast in the oven for 15 minutes. Remove hazelnuts from oven. Place nuts in a plastic bag and crush them with a rolling pin.

Whisk the almond meal and 150 grams of the powdered sugar together in a small bowl. Add 55 grams of egg whites to the top of the mixture. DO NOT mix in the egg white. Set the mixture aside.

Mix 150 grams of powdered sugar and the water in a small sauce pan. Put 55 grams of egg white into the bowl of a mixture and begin whipping to create a stiff meringue. Begin heating the sugar/water mixture on medium high heat to create a simple syrup. When the syrup reaches approximately 245 degrees, remove it from the heat and slowly add it to the meringue by pouring the hot liquid down the side of the mixing bowl as the mixer is still running. Continue to beat until the mixture cools.

Fold the almond/sugar/egg white mixture into the meringue, using firm strokes at first to incorporate all of the dry ingredients. Continue to mix carefully until the mixture has the texture of cold honey. If you lift the batter up with the spatula, it should fall off slowly in thick ribbons.

Transfer the batter to a piping bag and pipe onto a parchment or silpat covered baking sheet. Sprinkle hazelnuts over the tops of the shells. Let the piped shells rest for approximately thirty minutes, or until they are dry to the touch. Bake in a pre-heated over at 345 degrees for 15 minutes, or until the shells show slight color.

Remove from the oven and let the shells cool for a few minutes, then slowly remove them from the parchment paper and move them to a rack to cool completely.

Coffee Ganache
200 grams white chocolate
200 grams heavy cream
10 grams coffee

Melt the white chocolate over a hot water bath. Meanwhile, bring the cream to a boil over medium-high heat. Once the cream is boiling, add the coffee and remove the mixture from the heat. Cover and let steep for a few moments until the coffee has infused some flavor into the cream. Strain through a fine mesh sieve and mix into the melted white chocolate. Pour the chocolate mixture into a glass dish and cover with plastic wrap so that the plastic is touching the surface of the chocolate. Refrigerate until the chocolate has a firm yet creamy texture.