Pages

Wednesday, December 23, 2009

The Daring Bakers December 2009 Challenge: Gingerbread Houses

The December 2009 Daring Bakers’ challenge was brought to you by Anna of Very Small Anna and Y of Lemonpi. They chose to challenge Daring Bakers’ everywhere to bake and assemble a gingerbread house from scratch. They chose recipes from Good Housekeeping and from The Great Scandinavian Baking Book as the challenge recipes.


I really should have opted out of this month's challenge. Gingerbread houses?? More arts and crafts than baking. December has been such a busy month, between changing jobs and preparing for the holiday party in Salem... the last thing I needed to do was spend hours slaving away over an edible house. So what did I do? I decided to invite my friends over for a Gingerbread House party... because when you don't have time to make one house, you should make three or four. What a mess. The party itself was fun, but this challenge was so labor intensive that I am going to have to opt out of future decorating-focused challenges. Much to my embarrassment, this challenge kicked my butt.


For the gingerbread, I opted to use the recipe from Good Housekeeping. I had all of the ingredients on hand, and the lack of butter and eggs made it feel like a cheaper option. I doubled the recipe and had enough dough to make four houses and some accessories. I was too tired to make the accessories or the fourth house - but if I had wanted to, there would have been enough dough.

The gingerbread dough was pretty stiff and difficult to roll out right when it was pulled out of the fridge. I had better results (and my wrists were much happier) with the chilled dough that had sat out of the fridge long enough to return to room temperature. A number of daring bakers complained that shrinkage during baking was a problem. Once I had rolled out my dough, I chilled it in the fridge for 30 minutes before baking and did not really have any problems with shrinking. Problems with the dough itself? That is a whole other story.

I don't know if it was an error in the Good Housekeeping recipe or the weight conversions that our hostess used when reprinting the recipe, but my dough was a mess. A crumbly, dry mess. It took about a half cup of water and several tablespoons of cream to get it moist enough for rolling... and at that point the dough had been kneading so much that it was nearly unworkable. At about 2am the night before the gingerbread party, I had to call it quits... sweaty and tired with wrist cramps... I just could not roll out any more cookies.


Instead of making my own template, I borrowed a basic one from Martha Stewart. I chose the template because it had a pattern for a chimney, which set it apart from other patterns I found on the internet. After two days of rolling out and baking gingerbread, I decided not to make the chimney. So much for the cute pattern.


In terms of mortar or cement, I stuck with royal icing and passed on the simple syrup glue. For royal icing, I used a basic recipe - 3 egg whites beaten to a medium meringue. 1 1/2 pounds of powdered sugar were gradually mixed into the meringue and beaten until the mixture was stiff and fluffy, stiff being the operative word. When I first started to think about how I would attack this challenge, I had visions of beautifully decorated homes dancing around in my mind - homes with perfectly piped icing, precisely placed candies, and possibly even some fancy marzipan or fondant modeling. Yeah. Right. The icing was a mess. Thick... heavy... and not pipe-able. It squeezed slowly out of the tip in thick globs that were so messy that after a few tries, I resorted to slopping it on the house with my fingers.

On top of all of that, our gingerbread houses also had structural issues. Somehow I put them together incorrectly which meant that the roofs were too small. We had to resort to an elaborate support system (using chewed gum as cement) to get the roofs to stay up. Ugh.

And voila - our gingerbread village. I wish I could say that a small child decorated mine, but alas, it is my own clumsy icing work. I can ice a cupcake with my eyes closed, but gingerbread houses are just not for me.


My recap of operation gingerbread makes it sound like I slacked off on this challenge. The sad thing is, that could not be further from the truth. I WISH I had slacked off. Instead, I spent WAY too much time on this with little to show for it. I told A that if our unborn children wish to build holiday gingerbread houses, they will have to visit a friend. This is the first, and last time that I would be doing anything like this.

Here's to hoping that the January challenge is more up my alley.

Sunday, December 20, 2009

Pear & Hazelnut Tart, Citrus Macarons


I noticed that a number of people are stumbling across my little blog because it is coming up in google search results for "macarons" and "air-pockets"... I am assuming from people who are struggling to solve the problem of air-pockets in their home baked macarons. Since google seems to think that my blog should provide that information, I decided I should probably share some of what I have learned on this subject over the past few months of trouble-shooting recipes.


It took about 3 or 4 months of experimenting for me to find a reliable recipe. As mentioned in a previous post, I started working with a "french" method recipe, but ultimately settled on the Italian method, which seems more complicated at first glance but is actually much more forgiving. See this post for more information on the difference between the french and italian methods. Syrup and Tang also has an excellent explanation of the two.

With the french method, I never solved the air-pocket problem. I tried every oven temperature variation... I tried baking with two sheets to insulate the shells... I tried over mixing and under mixing... each time my shells looked beautiful but the texture was completely off. The exterior shell would crunch when bitten, revealing a large interior air pocket between the softer "cake". A combination of patience and Pierre Herme's italian method helped me fix this problem.

I noticed that even with the italian method, the air pocket problem still exists if you try to eat the shells fresh out of the oven. The air pocket also remains if you try to eat the shells immediately after filling them. Interestingly, if you fill the shells and then refrigerate them for about 24 hours, the air pocket disappears and the macarons have the delicate texture of those you find in a professional bakery. I think it has something to do with the shells absorbing some of the moisture from the filling - it softens the interior and just helps the whole thing come together. Moral of the story - macarons can't be rushed!

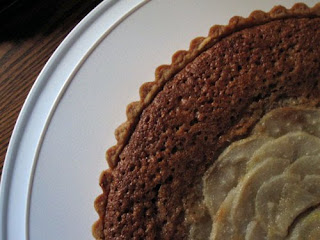
Moving on to this week's baking... as the Christmas party in Salem rapidly approaches, I find myself trying to squeeze in a few last test runs to make sure that everything comes out alright. We had a dinner party on Friday night, and as usual, I volunteered to bring dessert. I had a ton of leftover hazelnuts, so I thought I would give the pear frangipane tarts another go. The first time I experimented with this recipe, I did a straight walnut frangipane. It was okay... A loved it... but I did not think that the walnuts were flavorful enough when paired with the poached pears. Hazelnuts did the trick, giving the tart a more interesting flavor. Whipped cream or vanilla ice cream adds a nice touch. A miniature version will be added to the Christmas menu.


And of course some macarons to accompany the coffee. Now that I can make them, I will gladly jump on any excuse to whip up a batch. Leftover meyer lemon curd meant citrus macarons were on the menu.
Recipes after the jump!

Wednesday, December 16, 2009

Sunday, December 6, 2009

I am a macaron master: Hazelnut, white chocolate and coffee macarons


I have finally mastered the macaron. Okay, so maybe I haven't exactly mastered it, but I am close enough that I can pretty much make a batch of decent cookies on demand, whenever I want. Music to A's ears... my phone call on Friday afternoon announcing that I would no longer need to make macarons every weekend. I had finally found the right recipe and honed my technique to the point that I can produce reliable macaron shells at any time. Other home bakers out there who have tried to make macarons will understand just what a triumph my success was. (This funny write-up describes the macaron obsession accurately.)

A few weeks ago, my Pierre Herme macaron cookbook arrived from France. After a few days studying and translating the recipes, I had decided that it was time to pull out the mixer and start separating some eggs. At first, I found his recipe a little intimidating due to its call for the use of a thermometer. All of my past attempts at macarons had involved the French method, while Herme recommends using the Italian method. The difference is that the French method involves whipping egg whites and sugar into a stiff meringue and then incorporating the dry ingredients. With the Italian method, it is necessary to prepare a hot sugar syrup that is then poured into the meringue to produce a stiff Italian meringue that almost has the texture of marshmallow.

The Italian method involves a few extra steps, but it yields much more reliable results. Perfectly smooth shells with fluffy feet and, most importantly, no air-pocket inside. Another bonus - overmixing is not as much of a problem as it is with the French method. In fact, in my trial and error, I found myself undermixing more often than overmixing. If the batter looks lumpy, keep mixing. If you see beaks forming on the tops of your shells as you pipe them out and those beaks refuse to sink into the shell after a few seconds, keep mixing.


You might ask after seeing the photos... why do they have a funny blueish-green tint? Honestly, I was so convinced that I would fail yet again, that I thought this would be a good time to play with food coloring. I added some blue dye just to see what would happen. Of course this would be the time that the batter cooperates, leaving me with beautiful, but oddly tinted cookies.

A little hazelnut garnish on top gives these a little something extra.


Here is the recipe I used, adapted from Macaron, by Pierre Herme:

Macaron Shells
yield: approximately 36 sandwiches or gerbet

60 grams hazelnuts
110 grams egg white, aged
300 grams powdered sugar
150 grams almond meal
37 grams water

Preheat the oven to 360 degrees. Spread the hazelnuts on a baking sheet. Toast in the oven for 15 minutes. Remove hazelnuts from oven. Place nuts in a plastic bag and crush them with a rolling pin.

Whisk the almond meal and 150 grams of the powdered sugar together in a small bowl. Add 55 grams of egg whites to the top of the mixture. DO NOT mix in the egg white. Set the mixture aside.

Mix 150 grams of powdered sugar and the water in a small sauce pan. Put 55 grams of egg white into the bowl of a mixture and begin whipping to create a stiff meringue. Begin heating the sugar/water mixture on medium high heat to create a simple syrup. When the syrup reaches approximately 245 degrees, remove it from the heat and slowly add it to the meringue by pouring the hot liquid down the side of the mixing bowl as the mixer is still running. Continue to beat until the mixture cools.

Fold the almond/sugar/egg white mixture into the meringue, using firm strokes at first to incorporate all of the dry ingredients. Continue to mix carefully until the mixture has the texture of cold honey. If you lift the batter up with the spatula, it should fall off slowly in thick ribbons.

Transfer the batter to a piping bag and pipe onto a parchment or silpat covered baking sheet. Sprinkle hazelnuts over the tops of the shells. Let the piped shells rest for approximately thirty minutes, or until they are dry to the touch. Bake in a pre-heated over at 345 degrees for 15 minutes, or until the shells show slight color.

Remove from the oven and let the shells cool for a few minutes, then slowly remove them from the parchment paper and move them to a rack to cool completely.

Coffee Ganache
200 grams white chocolate
200 grams heavy cream
10 grams coffee

Melt the white chocolate over a hot water bath. Meanwhile, bring the cream to a boil over medium-high heat. Once the cream is boiling, add the coffee and remove the mixture from the heat. Cover and let steep for a few moments until the coffee has infused some flavor into the cream. Strain through a fine mesh sieve and mix into the melted white chocolate. Pour the chocolate mixture into a glass dish and cover with plastic wrap so that the plastic is touching the surface of the chocolate. Refrigerate until the chocolate has a firm yet creamy texture.

Friday, November 27, 2009

The 2009 November Daring Bakers Challenge: Cannoli!

The November 2009 Daring Bakers Challenge was chosen and hosted by Lisa Michele of Parsley, Sage, Desserts and Line Drives. She chose the Italian Pastry, Cannolo (Cannoli is plural), using the cookbooks Lidia’s Italian-American Kitchen by Lidia Matticchio Bastianich and The Sopranos Family Cookbook by Allen Rucker; recipes by Michelle Scicolone, as ingredient/direction guides. She added her own modifications/changes, so the recipe is not 100% verbatim from either book.


I honestly had no idea what to expect from the November challenge. Thinking about what I usually bake in November, I had vague expectations of something involving pumpkin... or maybe apples... or cloves... something Thanksgiving-y. Imagine my surprise when I saw that I would be learning to make cannolis this month! I often forget that the rest of the world doesn't equate November with pumpkin pie and turkey!

So cannolis are both easy and difficult at the same time. I only tried the recipe once and had no trouble. I ended up with mediocre cannolis. (A loved them... but maybe just because I made them?) That said, in testing my results and working through the recipe, I think that a few simple changes would have yielded a much better final product.


The shells were crisp enough and the flavor was good, but I did not get the light, flaky, blistery texture that you find in the shells at good Italian bakeries. I think I may not have rolled my dough out enough, but if anyone has any other ideas, I would welcome them.


Here are a few things I learned while making the shells:

1. This is a very stiff dough. I read that you can use a pasta machine to roll it out thinly enough, but this did not work for me. I may not have put enough liquid into the dough, as it started to crumble and fall apart after the first run through the pasta machine. I switched to a rolling pin, but at this point the dough had gotten so stiff that I had trouble getting it to stay where I rolled it - the gluten kept snapping back.

2. I think the marsala wine and cinnamon combination is the key to the shell's flavor. I know that you can use other wines, but I was very pleased with the way the marsala tasted and would recommend sticking with it.

3. These shells fry quickly! If you don't pay attention, they will burn. My first four shells were black when I pulled them out of the fryer. I cooked them in canola oil because it is what I had on hand. Maybe another type of oil would be better?


4. Try to pull the shells off of the cannoli forms immediately. The faster the better, because if you let them sit for too long, they stick.

For the filling, I decided to make a standard ricotta based cannoli cream with some pistachio paste and mini-chocolate chips mixed in for additional flavor. The filling was a piece of cake - mix the ingredients together and simply pipe it into the cannoli shell.

A loved the enough that he insisted they should be added to the menu for the Salem holiday party. I will be making cannoli again. Thanks again to the Daring Bakers for picking a great recipe and forcing me out of my baking comfort zone!

Wednesday, November 18, 2009

Buttermilk Pudding with Fresh Berries


This weekend I had to set aside some time to test recipes for the holiday party. Though much it has not been written about on this blog, the past few weeks have been a flurry of selecting and testing recipes as I assemble the final menu. A, who usually loves my baking, is actually starting to get burned out on the volume of sweets coming out of the kitchen. I keep promising him that once the holidays are over, I will make an effort to cut down on the sweets.

For much of the menu, I plan to rely a few of my most reliable recipes - marzipan cupcakes, cheesecakes, apple tarts, etc, because they all have a "comfort food" feel that should fit the New England cold. They also tend to be a little "heavy" if you eat to much at once. I needed something light and fruity to round things out. Panna cotta felt like a good place to start. Internet research led me to a recipe for berries and buttermilk pudding on Epicurious. Though not exactly panna cotta, it looked close enough.

I had never made panna cotta/pudding from scratch before. If I had known just how easy it would be, I think it would have been part of my standard repertoire. THe entire recipe, from start to finish, took less than half an hour. If you are pressed for time, you can prepare the pudding a day ahead of time, and then cook the strawberry sauce the day you plan to serve it. The Epicurious recipe claimed two be 4 servings, but I thought it was better broken down into 8 servings. For the topping, any fresh berries will do.

The pudding itself has a very light texture with a slightly tangy flavor. It should make a nice complement for the rich sweets that I plan to serve on the dessert bar.

Sunday, November 8, 2009

Bagels, Homemade Mascarpone, and Olive Tapenade


Early last week, I think maybe Monday or Tuesday night, A and I had a conversation that went something like this:

A: You know, we haven't had bagels in a really long time. Maybe we should do bagels next week.
Me: I didn't know that you like bagels. I eat them all the time, but never bring them home.
A: I love bagels!
Me: Okay, I'm sure I can make bagels. I will make you some next weekend.

A paused for a moment, looking at me a little strangely.

Me: Wait, you didn't think we would buy bagels from a store did you?
A: Well... kind of?
Me: How long have we been married? You think I would buy something that I could bake and pass up the opportunity to try a new recipe?
A: I wasn't sure. Maybe?
Me: Ugh, don't worry. I won't make a mess of the kitchen.

And with that, the matter was settled. Bagels would be made for Sunday brunch.

Of course bagels alone wouldn't be enough - I needed to prepare something to put on them. It was another traveling week for A, so during the week I was left alone to play in the kitchen. Lately I have been looking into making home-made cheese (more on that in a later post) and found some easy instructions for home-made mascarpone. Perfect! Who needs Philadelphia when you can make your own Italian version.

A craving for olives helped me finish the menu. Olive tapenade would be the perfect compliment to the mascarpone and is super easy to make. Wolfgang Puck's black and green olive tapenade is my go-to recipe. It is simple and flexible. The recipe specifies picholine and Nicoise olives, but the recipe tastes just as good with any other marinated olive. I have used Kalamata and Manzanilla olives with good results. Leftover tapenade can also be turned into a puttanesca sauce... just add a sauteed onion and some canned diced tomatoes.

I turned to the Bread Baker's Apprentice for my bagel recipe. I had never baked bagels before, so I thought that Peter Reinhart's almost fool-proof recipes would be a good place to start. He provides a formula for a chewy, "New York" style bagel that is boiled first, then baked. He claims that the secret to getting the flavor right is to "alkalize" the water with baking soda before boiling the bagels.


Since it was my first try, I stuck with plain bagels. I figured I should master the plain recipe first so that I don't waste toppings and inedible product. Overall, my first bagels were a success. A enjoyed them, and told me he would never consider purchasing bagels again. I was almost satisfied (being a perfectionist can suck at times!). The internal texture and flavor was good, but the outside of the bagel was a little chewier than I would have liked. I think more research on perfecting the bagel is needed!

Sunday, November 1, 2009

Meyer Lemon Macarons

I have never really been crazy about citrus flavors; orange is okay, but lemon and lime are flavors that I usually pass on when served alone. When it comes to candy, I will pick out the reds, leaving anything yellow and green behind. I am one of those red swedish fish people.

As I get older, I find myself more tolerant of the flavors. Though still not my favorite, I am willing to taste lemon or lime flavored things and even occasionally experiment with the flavors myself. I am not sure if my palette is changing, or if maybe I am making an effort since lemon and lime are two of A's favorite flavors. He has been known to polish off an entire key lime pie on his own if given the opportunity.

Over the weekend while grocery shopping, I saw meyer lemons for sale at the produce exchange. Now normally I wouldn't have noticed the lemons, or any of the citrus for that matter, as I only tend to grab the occasional lemon or lime demanded by a recipe. Over the past few weeks, I have noticed a lot of information popping up about meyer lemons on various blogs I frequent, so I have kept an eye out for them. After learning that they are sweeter and less acidic than regular lemons, I hoped that they could be the answer to my citrus aversion. Four made it into my basket, with A announcing that meyer lemon sorbet was just what he was craving. I quickly squashed those dreams and announced that meyer lemon curd would make a perfect macaron filling and that he would have to wait until another day for sorbet.

Honestly, I think my quest for the perfect macaron is making me a little nuts. I have noticed that I now judge food purely on how it might taste inside a macaron!


For the macarons, I used Tartelette's recipe, which you can find here.

I used a lemon curd recipe from Fine Cooking. I followed their recipe exactly, other than substituting 4 meyer lemons for the lemon juice they call for. Lemon curd has proven a challenge for me in the past, but this recipe seems fail proof. For some reason creaming the butter, sugar and eggs before mixing in the lemon juice seems to produce a smooth and creamy curd.

Place a dab of whipped cream on a shell followed by a dab of lemon cream. Gently sandwich the two cookies together. If you really can't wait, you can eat the macarons immediately, but I thought they tasted better after a day in the fridge.


Yum! While I don't think that meyer lemon will be a flavor I make often, I did enjoy it. A did too, though he is still grumbling about the sorbet.

This batch of macaron shells was a vast improvement over past executions. They melted in your mouth. I still had problems with air-pockets despite lowering the baking temperature to 310F. Next weekend I will try them at 300F.

Perhaps even more exciting than the macarons I baked was the arrival of my Pierre Herme cook book! Enfin! I think it only took two weeks for the book to arrive from France, but I feel like I have been waiting for ages. Maybe next weekend could be my first attempt at the "Italian" method for making macarons that he recommends... and maybe I should rename this the macaron blog!

Tuesday, October 27, 2009

The 2009 October Daring Bakers' Challenge: Macarons

The 2009 October Daring Bakers’ challenge was brought to us by Ami S. She chose macarons from Claudia Fleming’s The Last Course: The Desserts of Gramercy Tavern as the challenge recipe.

Imagine my excitement when I learned that my first Daring Bakers' challenge would be macarons! After a month or so of fussing with these finicky cookies, I couldn't wait to try a new recipe and learn some tips and tricks from other members. Here is the recipe Ami selected:

Ingredients
Confectioners’ (Icing) sugar: 2 ¼ cups (225 g, 8 oz.)
Almond flour: 2 cups (190 g, 6.7 oz.)
Granulated sugar: 2 tablespoons (25 g , .88 oz.)
Egg whites: 5 (Have at room temperature)

Directions:
1. Preheat the oven to 200°F (93°C). Combine the confectioners’ sugar and almond flour in a medium bowl. If grinding your own nuts, combine nuts and a cup of confectioners’ sugar in the bowl of a food processor and grind until nuts are very fine and powdery.
2. Beat the egg whites in the clean dry bowl of a stand mixer until they hold soft peaks. Slowly add the granulated sugar and beat until the mixture holds stiff peaks.
3. Sift a third of the almond flour mixture into the meringue and fold gently to combine. If you are planning on adding zest or other flavorings to the batter, now is the time. Sift in the remaining almond flour in two batches. Be gentle! Don’t overfold, but fully incorporate your ingredients.
4. Spoon the mixture into a pastry bag fitted with a plain half-inch tip (Ateco #806). You can also use a Ziploc bag with a corner cut off. It’s easiest to fill your bag if you stand it up in a tall glass and fold the top down before spooning in the batter.
5. Pipe one-inch-sized (2.5 cm) mounds of batter onto baking sheets lined with nonstick liners (or parchment paper).
6. Bake the macaroon for 5 minutes. Remove the pan from the oven and raise the temperature to 375°F (190°C). Once the oven is up to temperature, put the pans back in the oven and bake for an additional 7 to 8 minutes, or lightly colored.
7. Cool on a rack before filling.

Needless to say, I did not find success with this recipe either. Following the recipe with meticulous attention to detail yielded flat, dried out looking cookies that had nice flavor but did not even come close to resembling a proper macaron:


I could tell from the moment that I began to fold the dry ingredients into the meringue that something was off. The batter felt bubbly, and even after a half hour resting on the stove, the uncooked macarons would not dry out. Several other Daring Bakers suggested that the recipe is too light on the sugar. Three attempts later, I decided that this recipe was just not for me.

I was not ready to give up on macarons however. I think my favorite thing about The Daring Bakers is how eager the seasoned pastry vets are to help out novices like myself. For weeks, Audax and Tartelette have graciously provided endless advice, tips and tricks for how to coax the batter into a fluffy, melt-in-your-mouth macaron with both feet and a delicate shell.

After sifting through their comments and recommendations, I found a number of issues with my technique that had led to past failures:

1. Egg whites should be whipped until stiff. I was so paranoid about "over-mixing" that I think I stopped whipping at soft to medium peaks a few times. You will know they are ready when you can turn the bowl upside-down and the meringue does not move. (A gave me a very curious look the first time he saw me doing this)

2. Mix the dry ingredient in about 1/2 to 1/3 at a time - otherwise you will never get everything to mix together.

3. Once the dry ingredients are in, gentle does it. It is so easy to overmix at this point, and it seems that it is better to undermix than overmix, as spooning the batter into the piping bag mixes things up a little more.

4. Once the shells are piped onto the cookie sheet, let them dry at least 30 minutes, though the amount of time you need will vary based on the humidity where you live. I discovered that less time yields brittle shells, while more time yields macarons that are too crisp.

5. Even though many recipes say to cook them for 8-10 minutes, mine always took at least 15 to bake.

6. Once your macarons are done baking, turn the heat off in your oven and crack the door, leaving the macarons inside for about 20 to 30 minutes. This will make it easier to remove them from the sheet.

Though my latest batch was still not perfect, following these rules and using a recipe based on Tartelette's formula produced something near perfect. Seventh try is the charm, right? At Audax's suggestion, I have started using ratios for my recipe - a perfect solution to random amounts of extra egg whites.

The shells came out beautifully - nice, puffy and round on top with perfect little feet on the bottom. Since I had expected another failure, I did not have anything exciting to fill them with, so I mixed some cinnamon into leftover cream cheese frosting.


Voila, cinnamon macarons with cinnamon cream cheese icing:


While this batch looked perfect, the interior of the cookies did not rise enough, leaving an air pocket inside, which makes the cookie crumble when you bite into it. I am hoping that trouble-shooting oven temperatures will fix this issue.

I dare say that baking the perfect macaron has become a bit of an obsession for me. I ordered Pierre Herme's macaron cook book yesterday from Amazon.fr, with hopes that it will provide additional insight into how I can perfect my technique.

More to come!

Monday, October 19, 2009

The first menu item: Apple Tartelettes

The weekend went by all too quickly in a rush of bad weather and errands. On top of that, I've been sick with a winter cold. A WINTER COLD!! Yes, it is October and it really feels almost like winter has arrived. I feel incredibly cheated by all of the global warming cassandras. Here I was looking forward to balmy fall weather and instead I am getting highs of 45.

In addition to annoying me in general, the cold weather also makes me feel like Christmas is just around the corner. Yes, the Christmas Creep has hit our household. No... I haven't decorated or anything, but I am in full planning mode for my mother-in-law's dessert party. This weekend I was finally able to test my first recipe.

Last Christmas A gave me some miniature tart pans for Christmas so I plan to serve two different types of mini-tarts at the event. I am hoping the tarts will save me some time since many components, such as the crusts, can be prepared days, or even weeks ahead of time.

After scouring the Internet for recipes, I found a finally found a winner on Tartelette's blog - her recipe for her grandmother's apple tartelettes. I liked this recipe because it reminded me of apple pie with a twist. The tartelette featured a baked apple filling with pie spices like cardamom, but called for baked apples for the top instead of a lattice or second pie crust. The lemon sugar, vanilla bean, and crushed almonds added unexpected depth to the flavor.

Instead of baking them in medium tart pans as Tartelette did, I used my minis. A half recipe produced enough filling for 9 mini-pans which was great news. A single full recipe should do it for the party.

The prep work was quick and the flavors delicious. I presented them nervously to A, who wanted to know why I couldn't just make plain old apple pie (one of his favorite desserts). A single bite later, I was instructed that the recipe was a winner and apple pie would not be needed.


WOOHOO! One menu item down. Only 8 to go.

I still need to play with the crust for this recipe a little. In my first attempt, the crust stuck to the pans making it difficult to remove the tartelettes without damaging them. This is a problem that I will troubleshoot in the coming weeks.

And of course, this week's posting would not be complete without my weekly bread, a sourdough loaf. I will write about bread in future weeks.

Thursday, October 15, 2009

The Daring Bakers & Holiday Parties

Once again travel pulled me away, this time for a wedding in LA, making this blog less and less of a routine for me. I hope I can get back into the grove with this.

I don't really have a whole lot to report at the moment. I recently joined The Daring Bakers, and have spent most of my baking time plugging through my first challenge. Results will be posted at the end of the month.


Until then... what else should I bake this weekend?

As a Christmas gift to her (clearly she means a gift for me, right?), my mother-in-law has asked me to "cater" a dessert party at her home in Salem over the holidays. I have only about two months to come up with a menu and test recipes, which is stressing me out a little. I am stressing about the menu, making sure people like everything and making sure I can cook everything on time in someone else's kitchen(!). Then, when I am finished stressing about that, I start stressing that I will never become a professional if I am this worried about a single, small event. Ugh. Being a perfectionist sucks.

At any rate, as the menu solidifies, I will start posting what I have chosen, not chosen, and of course, the results of my experimenting.

Monday, October 5, 2009

Something savory for a change...

I have been gone for awhile. A ran off to Mexico for a few weeks for work, taking the camera with him to document the festivities for a friend's bachelor party, and leaving me unable to update the blog. I suppose I could have written some posts sans images, but what fun is a blog without pictures? At any rate, it is October now (how time flies!) and I am back.

Fall has arrived and the unseasonably cold weather makes it feel as if winter is really just around the corner. It was the first weekend that A had been home in a long time and the first weekend in months that we had nothing scheduled. The two of us were looking forward to relaxing at home and finally indulging in some home cooking. The chill in the air brought a craving for comfort food - something warm and hearty. A wanted a stew - heavy on the meat and potatoes. Stew isn't really my thing, so we decided to compromise with a veal and porcini ragu from Epicurious.

The lazy weekend meant plenty of time for adventures in the kitchen, so we decided to take things up a notch and break out the pasta maker (a perfect wedding gift that has been woefully underused, sorry E). I have made pasta a few times before with moderate success... moderate success meaning that the dough held together but could not really be shaped. Since we had all day to experiment, we decided to go bold and try the fresh pasta recipe in the French Laundry Cookbook.


Needless to say, the recipe came together perfectly. After I finished kneading and set the dough aside to rest, I declared that if this pasta works, Thomas Keller is a genius. A reminded me that many people already considered Thomas Keller to be a genius and that the outcome of my pasta would have no impact on his reputation.

At any rate, for a first try, the pasta turned out beautifully. The dough rolled out easily, with minimal breakage, and remained moist until it I was finished cutting. I got a little overzealous with the machine and tried to roll almost the entire recipe as a single sheet of pasta. Next time I will definitely cut things down - it will make my life much easier.

I can't wait to try this again in a few weeks!

Here is the fresh, uncooked pasta:


Here is the pasta, cooked and sauced with veal and porcini ragu (I usually add extra meat and sausage):


And of course what is pasta without bread to accompany it:

Friday, September 18, 2009

Another weekend, another batch of cupcakes...

After a hectic past few weeks, it looks like it is time for life to return to normal just as summer draws to a close. It is only mid-September, but after an unusually cool summer, you can already feel the crisp chill of fall creeping in. If I did not find the cold weather in the north east so intolerable fall would be my favorite season. Fall means beautiful oranges, golds and reds under a cloudless sky, best enjoyed in a snuggly sweater with a cup of warm soup. It also means warm, hearty comfort food, as root vegetables, apples and pears come into season. Naturally food is my top of mind association when I think of fall. I think it is my first thought when you mention almost anything. Not the case for A… fall means football.

This past weekend we were invited to watch NFL opening day with friends. I could have cared less about the game, but A. is a die-hard fan. Somehow I managed to grow up in Texas without developing an appreciation for the sport. The host requested cupcakes and I was more than happy to oblige. I ended up cancelling due to a last minute work conflict, but A. headed to Tribeca on his own toting the promised dessert under protest (he dislikes carrying the 'emasculating' cupcake carrier).

I had a can of opened almond paste nearing expiration in the refrigerator, which the cupcakes would be almond cupcakes. I also had several pounds of frozen raspberries that I picked a few weeks ago with my mother which I thought would make a nice raspberry frosting – a last taste of summer berries to bid the season farewell. I modified the Vanilla Cardamom cupcake recipe that I posted a few weeks ago, incorporating the almond paste and omitting the cardamom. For the icing, I pureed and strained some raspberries and mixed them into a pretty standard recipe for cream cheese frosting.


The almond flavor blended deliciously with the vanilla bean, producing a sweet, yet still subtle flavor in the cake. The cupcakes will still a little bit dense, but improving since the first time I played with this recipe. I had mixed feelings about the raspberry frosting. The flavor was nice, but the texture was not ideal. Not surprisingly, the added berry puree made the icing a bit fragile due to the added liquid. I like the idea of mixing fresh fruit into the frosting, but think that a dried powder might produce a richer flavor with a better texture in the future.


Almond Cupcakes

yield - about 14 cupcakes


9 oz flour 1 tsp cornstarch

1 & 1/8 tsp baking powder

pinch salt

4 oz almond paste

5 oz butter

10 oz sugar

1 egg

1 egg white

2/3 cup milk

1 tsp vanilla extract

vanilla bean seeds from one vanilla bean


Mix together flour, cornstarch, baking powder, and salt in a medium bowl; set aside.In another bowl, mix the milk, vanilla extract and vanilla bean seeds. Set aside.


Cream butter, almond paste and sugar together until light and fluffy in a large bowl. Mix in egg and egg white, one at a time.Mix 1/3 of the flour mixture into the butter/egg/sugar mixture. Stir in completely, scraping down the sides of the bowl. Add half of the milk mixture, incorporating completely. Add the rest of the flour and milk mixtures in 3 additions, alternating between wet and dry ingredients. Take care not to over-mix.


Divide batter into cupcake tins and bake at 350 degrees for about 22 minutes.

Friday, September 11, 2009

Macaron almost success!

I think life is finally returning to normal after an unusually hectic August. A and I were travelling for weddings and family commitments every weekend, culminating in our annual Labor Day tradition – a visit from our West Coast friends.

What a waste today was. Friday… the end of a four day work week, turned into a three day work week for me due to busted internet, which forced me to stay home and wait for the cable guy. I know… I probably should not complain. But the weather was foul and I have no internet, which means I can’t work… can’t do much of anything and I am stuck inside, waiting. Also, I know I will pay for this unexpected day off when I arrive back at work on Monday to the pile of untouched papers and unread email.

What does one do when stuck at home with nothing to do? For me the answer, of course, is bake. I decided that I might as well make a third attempt at macarons. Veronica over at Kitchen Musings was kind enough to respond to my calls for help. After taking a look at the photos of my past efforts, she suggested that I was probably under-baking them. My third attempt indicates she was right.

I made the standard recipe for almond macarons listed at Kitchen Musings. I decided that until I get these things right, I better not waste ingredients by trying to make fancy flavors. Third time is a charm. Though the macarons were still not perfect, I did not have the same problems with deflating cookies sticking to the sheet and falling apart. They didn’t exactly glide off the sheet like the recipe says they should, but I was able to remove them without completely destroying them. Though they did hold together, I noticed that the top of the cookie did seem to sink into the “foot”, while the skins were still a bit fragile. I suspect that this could have resulted from slight over-mixing – something I will need to focus on for the next time around.


In the meantime, A should be delighted to see that this batch is not going straight from the oven into the garbage. His dollars and cents mindset causes him some anguish each time he sees me throw out ingredients. “Stop wasting money” he says, to which I remind him that trial and error at home is cheaper that tuition for pastry school!

I think that a dark chocolate ganache would be a nice complement for my first almost macaron success!

Tuesday, August 18, 2009

Goats cheese and peaches? Who knew?

Constant travel makes it difficult to find time both to bake and to keep a blog updated. It makes it doubly difficult to keep a blog about baking updated!

This past weekend my husband and I took a trip to Healdsburg, California, in the Russian River Valley for the wedding of close friends. If you have not been to the Russian River Valley before, I highly recommend planning a trip. We have travelled to a number of wine regions across the globe, from Napa to Franschoek, and felt that our experience in the Russian River Valley surpassed all. In addition to the delicious food and outstanding wine you expect from such a place, this region also boasts close proximity to the beach, as well as a number of outdoor activities from hiking in the Redwoods to bicycling around the country-side. We also found the wineries and eateries much more laid back than Napa and thought that the wine was better (as evidenced by the fact that we left with a case and a half!) Though hotter than the Bay Area, the fresh air and bright sunlight combined with ample shade from both trees and cafe umbrellas produce a relaxing atmosphere - the perfect antidote to city fatigue.


I think the highlight of the weekend (aside from watching close friends say their vows) was picnicking in the town square. On our way back from the beach, we kept stopping at farm stands on the side of the road, lured in by promises of fresh stone fruit and heirloom tomatoes. Tamara the Tomato Lady sold us 2lbs of tomatoes at 99cents a pound! What a bargain! We also purchased beautiful, ripe peaches and cherries from a man who swore that Raymond Burr's vineyard was the place to go in the area.
Once back in Healdsburg, we stopped by the grocery store to pick up fresh cheese, a baguette, some olive oil, hummus and dry sausage, and then took our goodies over to the fountain in the main square for a veritable feast. Sweaty from hiking with tomato juice dripping down our chins, it was one of the best meals I have had in a long time.

Though no baking was done, I did stumble across one of the most amazing flavor combinations I have ever tasted. Perhaps this has been out there for awhile, but have you ever tasted farm fresh peaches smothered in soft goats cheese? I feel like it should be incorporated into a tart in the near future!

Monday, August 10, 2009

Carrot cupcakes!

This past weekend I enjoyed a few beautiful days in Massachusetts with the inlaws. After several sticky and humid days in New York, it was a pleasure to escape to the city for a few days of cool coastal weather. As usual, a trip to see the inlaws means a batch of carrot cake must be made. I originally baked the famous triple layer carrot cake recipe for my mother inlaw several years ago, and she has since declared it one of her favorite cakes. As such, I make an effort to prepare some for her each time I see her.

I have made this recipe many times before with varying levels of success. Though the recipe is quite simple, there are a few things that can lead to falling cakes if you are not careful. First off, I recommend buying whole carrots, peeling them, and then running them through a food processor instead of buying pre-grated carrots. In my experience, the pre-grated carrots are too large for the cake and emit too much moisture during baking. I also recommend processing the nuts (I have made this with both walnuts and pecans. Both work well). This way you get the flavor of the nuts in the cake, but those who dislike the texture of nut pieces in their cake won't be bothered.


So, a little over a week into this whole blogging thing and I am already discovering that committing to regular updates can be a challenge. For the past few weeks, my husband was traveling constantly for work leaving me with tons of free time in the evenings after work. For the past two weeks he has been home and it has thrown me off schedule! I am not complaining - I am very happy to have him home... but having him home means less baking and less posting. Over the next few weeks I expect to be baking and posting with less frequency (yes, this is pathetic considering the brief amount time I have been doing this), as I will be out of town for several weekends in a row.

Wednesday, August 5, 2009

Macaron Fail!

My husband returned from Mexico last night, walked into the kitchen and asked, "why did you all of a sudden decide to make macarons tonight?". I looked at him indignantly and said, "you don't just decide to make macarons all of a sudden. This is something I decided to do last Monday night when I took the eggs out of the refrigerator."

The advanced planning necessary for making macarons makes it all the more devastating when they don't turn out. Last Monday, after spending quite some time perusing the macaron tips on Kitchen Musings and Tartlette, I decided to give it another go. Nothing motivates me to action like discovering something I can't do well... so expect to see more failed macarons on this blog until I manage to get it right.

I followed the instructions for a basic macaron shell that Tartlette provides, added some vanilla bean, and incorporated some of the tips from Kitchen Musings. My eggs "aged" on the counter for 48 hours... my whites were whipped to a glossy meringue... the almonds and confectioners sugar were folded in until the batter had the consistency of "magma". The macaron shells piped out beautifully onto my silpat (I used parchment in the last macaron fail, so thought I would try something new this time) . I let them rest on the counter for about half an hour before popping them in the oven.

Just as last time, when pulled from the oven, my macaron shells were a picture of perfection - glossy shells with fluffy looking little feet.

However, within moments, they began to sink, resulting in cracked shells.

After giving them a few moments to cool, I tried to remove a few from the silpat for closer inspection. Instead of peeling off, the top skin of the macaron came off, leaving a gooey, messy filling stuck to the silpat. What a disaster... and I haven't a clue how to fix it. HELP!

Into the garbage they went.

I have decided to close this post with a successful batch of cupcakes that I made last Saturday just to make myself feel better, and to prevent this blog from being about my baking failures. Every once in a while I do have a baking success!